Saturday, March 28, 2015

How to add Facebook like, Google plus and Twitter Tweet buttons to Tumblr blog

How to put Facebook like, Google plus and Twitter Tweet buttons in every post of your Tumblr blog...

Facebook Like Button for Tumblr

Go to the Facebook "Like button for the web" page and configure the button you need.
Then click on "Get code". A two-part code will be shown.
In my case:

Part 1:

<div id="fb-root"></div>
<script>(function(d, s, id) {
  var js, fjs = d.getElementsByTagName(s)[0];
  if (d.getElementById(id)) return;
  js = d.createElement(s); js.id = id;
  js.src = "//connect.facebook.net/nl_NL/sdk.js#xfbml=1&version=v2.3";
  fjs.parentNode.insertBefore(js, fjs);
}(document, 'script', 'facebook-jssdk'));</script>

Part 2:

<div class="fb-like" data-href="{Permalink}" data-layout="button_count" data-action="like" data-show-faces="true" data-share="true"></div>

Note in part 2 that you manually have to change data-href to point to {Permalink}, which is Tumblr's way to refer to the current post.
Keep the window or tab open, or copy the code somewhere aside. Further down we'll see what to do with these codes in Tumblr.

Google Plus +1 button

Head over to Google's +1 Button page and configure the button of your choice. To the right appears the code for the button. In my case:

Part 1:

<script src="https://apis.google.com/js/platform.js" async defer></script>

Part 2: 

<div class="g-plusone" href=”{Permalink}></div>
Note I added manually the href=”{Permalink} part, so the button will refer to the Tumblr post.
Keep the window or tab open, or copy the code somewhere aside. Further down we'll see what to do with these codes in Tumblr.

Twitter Tweet button

Head over to the Twitter Button page and configure the button as you want it. To the right ("Preview and code") you'll find the code. There's only one part. In my case:

<a href="https://twitter.com/share" class="twitter-share-button" data-url="{Permalink}">Tweet</a>
<script>!function(d,s,id){var js,fjs=d.getElementsByTagName(s)[0],p=/^http:/.test(d.location)?'http':'https';if(!d.getElementById(id)){js=d.createElement(s);js.id=id;js.src=p+'://platform.twitter.com/widgets.js';fjs.parentNode.insertBefore(js,fjs);}}(document, 'script', 'twitter-wjs');</script>
Note again the data-url="{Permalink} part.

Get it all into Tumblr

Log into Tumblr and go to the HTML editor. (See the beginning of Tumblr's Custom HTML manual on how to get there, if you don't know.)

Part 1

Now paste part 1 of Google's and Facebook's codes just before the </head> tag. (You can push Ctrl+F in the Tumblr's HTML editor and do a search), as follows:
<!-- begin Facebook like button part 1 -->
<div id="fb-root"></div>
<script>(function(d, s, id) {
  var js, fjs = d.getElementsByTagName(s)[0];
  if (d.getElementById(id)) return;
  js = d.createElement(s); js.id = id;
  js.src = "//connect.facebook.net/nl_NL/sdk.js#xfbml=1&version=v2.3";
  fjs.parentNode.insertBefore(js, fjs);
}(document, 'script', 'facebook-jssdk'));</script>
<!-- end Facebook like button part 1 -->
<!-- begin Google Plus button part 1 -->

<script src="https://apis.google.com/js/platform.js" async defer></script>
<!-- end Google Plus button part 1-->
(In italic are comments added by me for readibility afterwards).

Part 2


Next, paste the parts 2 of Google's and Facebook's code, and the Twitter code, just before the {/block:PostNotes} tag. Put them in an unsorted list (<ul>) as follows:

<!-- begin facebook, google plus, twitter buttons --><ul class=”socialShare”>
<li class="socialShare">

<a href="https://twitter.com/share" class="twitter-share-button" data-url="{Permalink}">Tweet</a>
<script>!function(d,s,id){var js,fjs=d.getElementsByTagName(s)[0],p=/^http:/.test(d.location)?'http':'https';if(!d.getElementById(id)){js=d.createElement(s);js.id=id;js.src=p+'://platform.twitter.com/widgets.js';fjs.parentNode.insertBefore(js,fjs);}}(document, 'script', 'twitter-wjs');</script>
</li> 
<li class="socialShare">
<div class="g-plusone" href=”{Permalink}”></div>
</li> 
<li class="socialShare">
<div class="fb-like" data-href="{Permalink}" data-layout="button_count" data-action="like" data-show-faces="true" data-share="true"></div>
</li>
</ul>

<!-- end facebook, google plus, twitter, linkedin buttons -->

CSS

Finally, to make them fit nicely one next to the other and on the same line, without bullets, add the following CSS lines just before the </style> tag:

<!-- begin CSS for social share buttons -->ul.socialShare {
      list-style-type: none;
      }
li.socialShare {
      display: inline;
      }
<!-- end CSS for social share buttons -->

Done!

Click on "Update preview" top right of Tumblr's HTML editor. If your blog doesn't seem broken, click "Save" (otherwise just close the browser window or tab so changes will not be saved) and give it a try on your blog's page.
Remember to refresh the browser window, and to actually click on an article and check there: the buttons are configured to appear in the posts itself, not on the home page.

Good luck!

Disclaimer: If smoke comes out of your ears or computer screen or your car is broken during or after trying this, I decline all responsibility.

If you appreciated this article for some reason or another, please share it (see the buttons below), and, of course, don't forget to Flattr! (Why?)


P.S Many thanks to the author of this article! If you want to learn CSS, HTML and many more web stuff, check out w3schools.com, it's awesome.

Sunday, March 8, 2015

Copyright protection for digital artwork: my creative free solution

ABSTRACT

As a free, simple, quick and working method to protect yourself as a digital artist from copyright infringement, the following combination might be sufficient:
  1. Keep original files in SVG/RAW/... format and/or high resolution and never publish these anywhere. These can (help to) prove authorship, but not the date of creation.
  2. The day before publishing the work on the WWW, email the image to be published to yourself and/or trusted friends. This can not prove authorship, but it can prove that the work existed at a certain date.
Together, these two methods could serve as free and sufficient copyright protection. 
(For better protection, registration with US Copyright Office or similar official services remains of course the standard.)

The copyright problem for digital artists

I am aware of the "Poor man's copyright" myth. It is a fact that mailing a letter to yourself, or similar tricks, will not (necessarily) be of help in a court case concerning copyright.
However, I make digital drawings and have been searching for a way to achieve copyright protection which is

  • easy, no hassle
  • quick (I don't want to wait days or weeks until I get confirmation)
  • and free or very cheap


I know that official registration, as with the US Copyright Office, is by far the best way to protect one's rights. However, it's not free, and for the amount of drawings I make, this is not an option for me. Way too expensive.

Basic protection is enough (for me)

At the same time, I only seek a basic protection. The idea is to have fun making art and sharing it without becoming paranoid but, at the same time, without becoming an all too easy victim of fraud, theft or plagiarism.
It doesn't bother me if other artists are inspired by my style or themes. That's what art is all about. 
It doesn't bother me if someone puts a copy of an image of mine (found on my website for instance) on his or her blog/website/facebookpage/... as long as
  1. interested parties can clearly identify myself as the creator of the work
  2. a direct link to my website is provided
  3. the image is in now way altered
  4. if someone copies or shares the copy, my name and website remain identifiable
However, it would bother me a lot if someone would make fame or money using or claiming an image as his/her own that is actually made by me. Concerning money, I have a right to my fair share of possible gains. Concerning fame, it's just not right.
So I want to have a stick behind the door to beat the last category up in case I want to.

Copyright isn't the problem, proving ownership is

Let's get some things straight here.
In a lot of countries, including mine, the creator of a work automatically obtains copyright for that work. So it's not necessary to do anything to obtain the legal copyright. You just get it automatically by creating a work.
Thus, the problem isn't getting the copyright. It's proving ownership. If someone steals my work and claims to be the creator, how am I going to prove I made it, or made it first? It'll be his/her word against mine. So actually what I want is 
  1. some proof of the fact that I made the image, 
  2. and (in case of plagiarism especially) that I made it at an earlier date than him/her.
These two aspects don't necessarily have to be solved by one single method, so I came up with the following "two-step" solution.

I have the originals, not bad to begin with

I make SVG drawings. The original SVG drawing always remains with me and will never be published anywhere. I only publish bitmap exports, in fairly low resolution. So one stick behind the door I have, is this SVG file. I can always generate a bitmap export in higher resolution than my opponent in court, to prove I have a source he/she doesn't have. Not bad to begin with.

Free copyright registration sites: I'm not convinced

But concerning proof of the moment of creation, it gets trickier. Good solutions have to be paid. Free solutions are somewhat untrustworthy. I investigated a few sites that propose free copyright registration and found that there's a risk of them disappearing, becoming paid, or being sold. The last happened to copyrighted.com in 2012, which didn't seem to affect it's workings but it might have, and to myfreecopyright according to this interesting and detailed post from 2012, entitled "MyFreeCopyright.com Is Now An Official Scam".

An email to yourself: not enough, but not totally worthless either...

Anyone will tell you that email is not (necessarily) acceptable as evidence in court. However, that's the short and incomplete answer and if you dig into it, email still might have it's use for some aspects of copyright protection.
The detail to consider is the following. The fact that the email was actually sent from a certain account to a certain account on a certain date with certain content and attachments can hardly be denied. Service provider logs would be difficult to falsify, and email headers, retrieved from the service provider itself, would be considered reliable. 
However, it cannot be established beyond reasonable doubt that the person who owns the account actually wrote and sent the email (see for instance this long and complicated article). Someone else might have hacked the account, or used it while the owner went to the toilet and forgot to lock his/her account.
So, in short, in anything but a murder case, the court will probably accept that the email was sent at a certain date with certain content. It will only refuse to acknowledge X or Y as the author of the mail.
So, my (very personal) conclusion is: if I send an email to myself and my wife, on a certain date, with an image in attachment, this could be sufficient proof that the image in question did exist at that specific date. The email will prove that my opponent (the thief) is not the original author of the work and actually unmask him as a fraud. What remains to be established is the true identity of the author. Which, in my case, I can do using my original SVG file. (In photography a RAW file might serve the same purpose). So, with the combination of email and original SVG (or RAW/...) files, I might be reasonably safe.

Conclusion

My very personal conclusion is the following. In order to protect digital drawings from copyright infringement, the following two things might be sufficient:
  1. possessing an original version of the work in a higher resolution than any resolution ever published, or in a RAW/SVG/... format (which amounts to the same)
  2. proof that the image existed prior to the date the "thief" claims to have created it
The combination of these two (in themselves incomplete) protections would together prove I am the original creator.

Practically speaking: basic copyright protection in 4 steps

So, practically speaking, here's what I plan to do. Whenever I finish one of my drawings and would like to share them with the world:
  1. Never share the original SVG/RAW/... format with anyone. This original is to be kept, like the negative of a photo, purely private. It will be proof that I created the work, without proving when I created it.
  2. Make a low resolution (say, for instance, 1200 pixels on the longest side) bitmap export of my image
  3. Put a copyright symbol, my name, the year and a link to my website on the bitmap export itself. This way all those lovely, innocent people who like and share my images afterwards, will automatically share also these data. (I am regularly frustrated while surfing the triple w, finding great artwork without any possibility to find out who created them, and want to avoid that as much as possible with my own work).
  4. Before I publish this bitmap export, email it to myself (possible CC to trusted people) and/or copy it to Google Drive. This will prove it existed at that date, without proving who created it (but that's taken care of in step 1)
  5. Publish the work on the world wide web (maybe wait a day after mailing it, to avoid time zone confusion and other quirks).
I might add that for those few images I hold especially dear, I would still use a service similar to the US Copyright Office. But for the bulk of them, I'll just do as outlined before: keep the originals as proof of creation, and use email as a "datestamp".

If I stand to be corrected or you have any questions or remarks, please use the comments below!


If you appreciated this article for some reason or another, please share it (see the buttons below), and, of course, don't forget to Flattr! (Why?)


DISCLAIMER: I am in no way a legal expert and this article is not to be considered legal advice.

Saturday, February 7, 2015

How to configure Wacom Intuos Express Keys on Linux

I have a Wacom Intuos Pro Medium Pen Tablet (or digitizer) PTH-651 and had some trouble assigning the buttons (or "express keys") on Ubuntu Linux 14.04 LTS.

Finally I got it working so here is my solution, using xsetwacom. It's in the official Ubuntu repositories so you can install it from there.

Getting to know your device names, parameters you can set and modifiers you can set them to.

First off, you'll need to know how Ubuntu calls your Intuos. You can do this with the following command (in a terminal window):
xsetwacom --list devices
In my case the result is:
Wacom Intuos Pro M Pen stylus   id: 14 type: STYLUS  
Wacom Intuos Pro M Pen eraser   id: 15 type: ERASER  
Wacom Intuos Pro M Pen cursor   id: 16 type: CURSOR  
Wacom Intuos Pro M Pen pad       id: 17 type: PAD    
Wacom Intuos Pro M Finger touch id: 18 type: TOUCH
Then you'll need to know what kind of buttons and other stuff you can configure using xsetwacom. The following command:
xsetwacom --list parameters
gives you a long list of parameters you can use, with a brief explanation of what they mean. The parameter "Button" for instance will be used to assign a key to a button (or "express key" as Wacom calls it).

Lastly, you kneed to know what you can set these parameters to. The following command:
xsetwacom  --list modifiers
gives you the list of modifiers (keys really) you can set the parameters to. The modifier "PgDn" for instance will be used to set a button ("express key") to act as if you press the "PageDown" button on your keyboard.

Configuring your buttons ("express keys")

The "general" command for assigning a key to a button on my Wacom Intuos Pro is the following:
xsetwacom set "Wacom Intuos Pro M Pen pad" Button 2 key "b"
The above command would set "button 2" of my Intuos to the key "b".

Seems simple enough, and it is really, except for the fact that the numbers of the buttons aren't really logical. To make a long story short, after a lot of trial and error I found that my buttons are numbered, from top to bottom:
2
3
8
9

1 (the big button in the middle of the Touch Ring)

10
11
12
13

In case they don't correspond for you, here's how I found them:

  • open a terminal window
  • type or copy/paste the following command:
xsetwacom set "Wacom Intuos Pro M Pen pad" Button 2 key "b"
  • open a simple text editor like mousepad or gedit
  • instead of typing, push the buttons on your Wacom Intuos and see what happens in the text editor. The button that types "b" is button number 2.
  • Now continue doing the same for the other buttons. Just change the button number in the above command (from 2 to 3 for instance) and push again all the buttons (except for the ones you found already of course).
Finally, as an example, I configure my buttons ("express keys") as follows:
xsetwacom set "Wacom Intuos Pro M Pen pad" Button 2 key "shift"
xsetwacom set "Wacom Intuos Pro M Pen pad" Button 3 key "ctrl"
xsetwacom set "Wacom Intuos Pro M Pen pad" Button 8 key "alt"
xsetwacom set "Wacom Intuos Pro M Pen pad" Button 9 key "esc"
xsetwacom set "Wacom Intuos Pro M Pen pad" Button 10 key "pgup"
xsetwacom set "Wacom Intuos Pro M Pen pad" Button 11 key "pgdn"
xsetwacom set "Wacom Intuos Pro M Pen pad" Button 12 key F1
xsetwacom set "Wacom Intuos Pro M Pen pad" Button 13 key F2

Configuring the Touch Ring

Now you got the hang of it, the Touch Ring is a piece of cake. Just replace "Button 2" with "AbsWheelUp" and "AbsWheelDown" (one for each direction) and you're good.
In my case, I use:
xsetwacom set "Wacom Intuos Pro M Pen pad" AbsWheelUp key "="
xsetwacom set "Wacom Intuos Pro M Pen pad" AbsWheelDown button 7
Now if you pay attention, the modifiers I chose seem a bit weird, right? Why would I use "7" to zoom out and "=" to zoom in? Here's where it gets goofy. I have an AZERTY keyboard (be-fr) and xsetwacom doesn't seem to like that a lot. It actually treats it as if it were a QWERTY keyboard, but not completely either. So I had a lot of trial-and-error fun, again, trying to figure out how xsetwacom interprets the keys on my keyboard. I didn't actually work it out, I stumbled by chance on the right keys for the zoom and left it at that.

Turning off touch

To turn off the "touch" reactivity of my tablet, I use the following command:
xsetwacom --set "Wacom Intuos Pro M Finger touch" touch "off"

A note on Inkscape and pressure sensitivity

I couldn't get pressure sensitivity working on Inkscape. Seems to be a bug in overlay-scrollbar finally. Apparently you can get around it by starting inkscape as follows from command line:
LIBOVERLAY_SCROLLBAR=0 inkscape
but that didn't (always) seem to work for me.
Finally I just removed the package "oevrlay-scrollbar" from Ubuntu. Pressure sensitivity works fine now.

Using your newly configured buttons

To use your buttons with the xsetwacom configurations, you need to first plug in your Intuos (otherwise the device name will be unrecognized by xsetwacom) and then, in a terminal, type your xsetwacom commands. The settings are lost at reboot.

If you don't like hassle, like me, you can just make a small text file where you keep the commands. If you put them all in a single line, separated by "&&" (see axample below), you can issue it as one long command.

I my case, the final command is:

xsetwacom set "Wacom Intuos Pro M Pen pad" AbsWheelUp key "=" && xsetwacom set "Wacom Intuos Pro M Pen pad" AbsWheelDown button 7 && xsetwacom set "Wacom Intuos Pro M Pen pad" Button 2 key "shift" && xsetwacom set "Wacom Intuos Pro M Pen pad" Button 3 key "ctrl" && xsetwacom set "Wacom Intuos Pro M Pen pad" Button 8 key "alt" && xsetwacom set "Wacom Intuos Pro M Pen pad" Button 9 key "esc" &&
xsetwacom set "Wacom Intuos Pro M Pen pad" Button 10 key "pgup" &&
xsetwacom set "Wacom Intuos Pro M Pen pad" Button 11 key "pgdn" &&
xsetwacom set "Wacom Intuos Pro M Pen pad" Button 12 key F1 &&
xsetwacom set "Wacom Intuos Pro M Pen pad" Button 13 key F2

Or you can make a shell script, of course. You can find all about that in the linuxwacom Tablet configuratio Wiki.

Good luck and have a nice day!


If you appreciated this article for some reason or another, please share it (see the buttons below), and, of course, don't forget to Flattr! (Why?)


Thursday, January 1, 2015

Remove HP Recovery partition to install Linux

Problem: I want to install Ubuntu Linux next to Windows on my new HP Probook 430 G2 laptop, but it comes with 4 primary partitions pre-installed. This is the maximum number of partitions allowed, which makes it impossible to install Linux in dual boot.

I googled a lot of solutions but finally settled on making a set of recovery disks and deleting the HP_RECOVERY partition as outlined in the HP support article "Removing the HP Recovery Partition".

Shrink volume in Windows 7

In order to install Ubuntu on a new HP Probook 430 G2, with Windows 7 pre-installed, I wanted to shrink the C: volume in order to make more space for Ubuntu.

So I did the usual:
- in Start Menu search box, I typed "partition"
- click on "Create and format hard disk partitions"
- I right-clicked on the C: volume and chose "Shrink volume"
- in the following window I could shrink the C: volume to about half its size. But the problem was that I wanted to shrink my partition more than what was allowed.

To cut short to the solution, here's how I unblocked the remaining space:

In short:

  • I disabled virtual memory
  • I disabled file indexing and deleted the index files
  • I also deleted shadow copies
  • Restart, shrink partition as desired
  • As far as desired, re-enable virtual memory and/or file indexing and make a restore point.

In long and detailed:
  • I disabled virtual memory (first steps are copied from Microsoft site):
    • Open System by clicking the Start button Picture of the Start button, right-clicking Computer, and then clicking Properties.
    • In the left pane, click Advanced system settings.  Administrator permission required If you're prompted for an administrator password or confirmation, type the password or provide confirmation.
    • On the Advanced tab, under Performance, click Settings.
    • Click the Advanced tab, and then, under Virtual memory, click Change.
    • Clear the Automatically manage paging file size for all drives check box.
    • Click on "No paging file" (further down in the same window)
    • Restart
  • Note: It might be necessary to disable also the creation of Recovery Points, which in my case wasn't active to begin with, so I can't help you here.
  • Upon restart, I still had the same problem. So I tried manually shrinking the volume using Diskpart (to find info on this, start the partition manager as explained at the beginning of this article, right-click on C: volume, choose "Shrink partition", and in the following popup window click the link that says "See Shrink a basic volume" which brings you to a help page with all explanations). 
    • Diskpart didn't succeed in shrinking the volume more than the graphical interface did, of course, but it did write an event in the system logs. As explained in Windows help about shrinking volumes, in the Application logs you can search for event 259 which details the file that blocks further shrinking. So click on Start Menu, type "log" in the search box and choose "view event logs". There, under "Event viewer" -> "Summary page events" in the section "Information", look for event ID 259 and, at the right (in the "actions" pane, click on "view all instances of this event). Click on the last one, chronologically, and there you should see the file name of the file blocking the further shrinking.
    • So here I found out that the indexing service was involved. 
  • So I disabled the windows indexing and deleted the index files:
    • To disable the service:
      • in Start Menu, type "services" and click above on "services"
      • Look for "Windows Search", right-click on it, stop the service and and put "startup service" to "disabled" so on restart it doesn't start again.
    • Then I deleted the index files:
      • first find out where they are
        • in Start Menu type "regedit" in the search box and click on "regedit" above.
        • find HK_LOCAL_MACHINE -> SOFTWARE -> Microsoft -> Windows Search and click on it. To the right, next to DataDirectory, you'll find the right directory (in my case %ProgramData%\Microsoft\Search\Data).
      • Then delete them as administrator: I opened a Windows Explorer window as administrator (type "explorer" in Start menu search field, right-click on Windows Explorer and select "Run as administrator"). Then I typed in the directory box on top "%ProgramData%\Microsoft\" (without the quotation marks), right-clicked on the "Search" subdirectory and chose "delete".
  • I deleted shadow copies:
    • I opened a command prompt as administrator (Start Menu -> All Programs -> Accesories -> Command prompt -> right-click and select: "run as administrator")
    • Typde "vssadmin list shadows" in command prompt
    • Typed "wmic" in command prompt and pressed enter. Then typed "shadowcopy delete" and at the prompt, selected "'Y" for every shadow copy.
  • Then I restarted and was able to shrink the partition to the desired size.


If you appreciated this article for some reason or another, please share it (see the buttons below), and, of course, don't forget to Flattr! (Why?)

Thursday, October 23, 2014

Dry, irritated eyes and puffed eyelids (CVS): try tea tree oil!

Since I started working about 8 hours a day before a computer screen, I have been suffering from dry, irritated eyes and especially sore and puffed upper eyelids. And now I have truly found a solution that works.

The keywords here are blepharitis; a microscopic mite called demodex; and, as far as the solution goes: tea tree essential oil, a natural (albeit very powerful - not to goof around with) extract of the tea tree plant.

I'll make this short. If you suffer, as I did, from red, itchy, irritated eyes and/or puffed and sore eyelids, the problem might be an excess population of demodex mites at the base of your eyelids. Everybody has them, you have too much of them (invisible to the naked eye). So you need to "weed them out" a bit.

Demodex-mite-scanning-electron-microscope-image-2
The problem: demodex parasitic mite (photo Alan R. Walker)
The remedy is extremely simple and cheap:
  • put a drop of tea tree oil (Camelia Sinensis) on your finger and rub it out a bit with another finger. Your fingertip should be moist with it, but there shouldn't be a real drop on it (otherwise the stuff might leak into your eyes and that really stings).
  • close your eye and rub the oil gently on the edges of your eyelids where your eyelashes begin. The idea is to get it on and around the base of your eyelids - but not into your eye. Repeat for the other eye.
  • the first weeks (I read a minimum of six) do this every morning on waking and every evening when going to bed. After that you need a regular hygiene (say once a day) just to keep the demodex at normal levels.
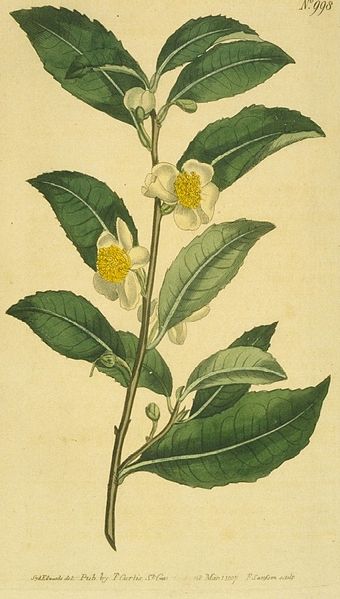
The solution: tea tree (source)
You'll find tea tree oil at your pharmacist's and at organic stores, amonst others.

Now be warned:
  1. Tea tree oil is strong and stings. Even when you don't get it into your eye but only on the eyelids, as you should, it will give a burning sensation. That's not harmful and it goes away within ten minutes (and gradually faster as you get used to it and better at applying it), but be prepared.
  2. If you do get it into your eyes, don't panic. It happened to me several times and has no lasting adverse effects to my knowledge. But it stings like hell for ten minutes or so.
  3. Apparently you shouldn't see this as a "disease" that the tea tree "cures". It's more like regular hygiene.
  4. I obviously urge you to consult a health care professional before doing this.
Here is some suggested reading:
To be complete, I should mention I also wear special computer glasses now. Mine are Prisma P1 Lite (lite because I work on AutoCAD and need to distinguish colors a lot). I am very pleased with them. Unlike Gunnar glasses, which I tried also, my Prisma computer glasses don't magnify which is perfect for me.
The glasses did ease my eye problems somewhat without solving them altogether (but I wear them foremost to protect my eyes from the too harsh computer screen light), it wasn't until the tea tree remedy that I really felt a true relief.

Good luck!

Sunday, August 3, 2014

Keyboard layout incorrect in unity

Problem: keyboard layout in Unity appears to be BE (azerty) (as shown in the icon in Unity panel top right), but when typing it turns out to be EN (querty). I just have to click on the BE-icon and "choose" BE again for the keyboard layout to be correct. But the problem returns after every reboot.
System: Ubuntu 14.04.1 (fresh install) on a HP Envy dv7 laptop

Solution:

  • as found in the comments on bug #1238346: 
    • delete the ~/.config/ibus folder with the command:
      rm -rf ~/.config/ibus
    • then type ibus-setup and in the window that appears, in the "Advanced" tab, tick "use sytem keyboard layout"
    • close all windows and reboot.